


Olympus OMD-EM10 monochrome conversion
- Anthony

- Mar 14, 2016
- 3 min read
The Olympus OMD-EM10 (mark 1) has a built-in monochrome preset called “monotone”. If you select this preset (menu -> Shooting Menu 1 -> Picture Mode -> monotone ) then you get a monochrome view in the rear screen and the EVF. This is really nice, you can visualise exactly what you’ll get in black and white. This is true both for raw and JPEG.
I really like the monochrome conversion built into the camera. I’d be quite happy to use it without further processing but being paranoid I generally shoot in raw format. If I were fool enough to use the Olympus raw conversion software that came with the camera (Olympus Viewer version 3) this would have the advantage of giving a workflow that’s in monochrome from start to end. I’m sensible though so I use Lightroom. The problem is that Lightroom ignores the monochrome conversion done by the camera to the embedded preview in the raw file and just shows me the raw file in colour. Additionally, I don’t get access to the camera’s nice conversion (did I say I liked it?)
So I’ve tried various simple conversions in Lightroom to see how they compare to the camera’s version.
WARNING – the differences between the different versions are quite subtle. You may not see any difference (or a spurious difference) unless you’re using a well set-up monitor. If you’re really interested, email me and I’ll send you full size versions.
The Conversions
The first picture shows the file as converted by the camera:
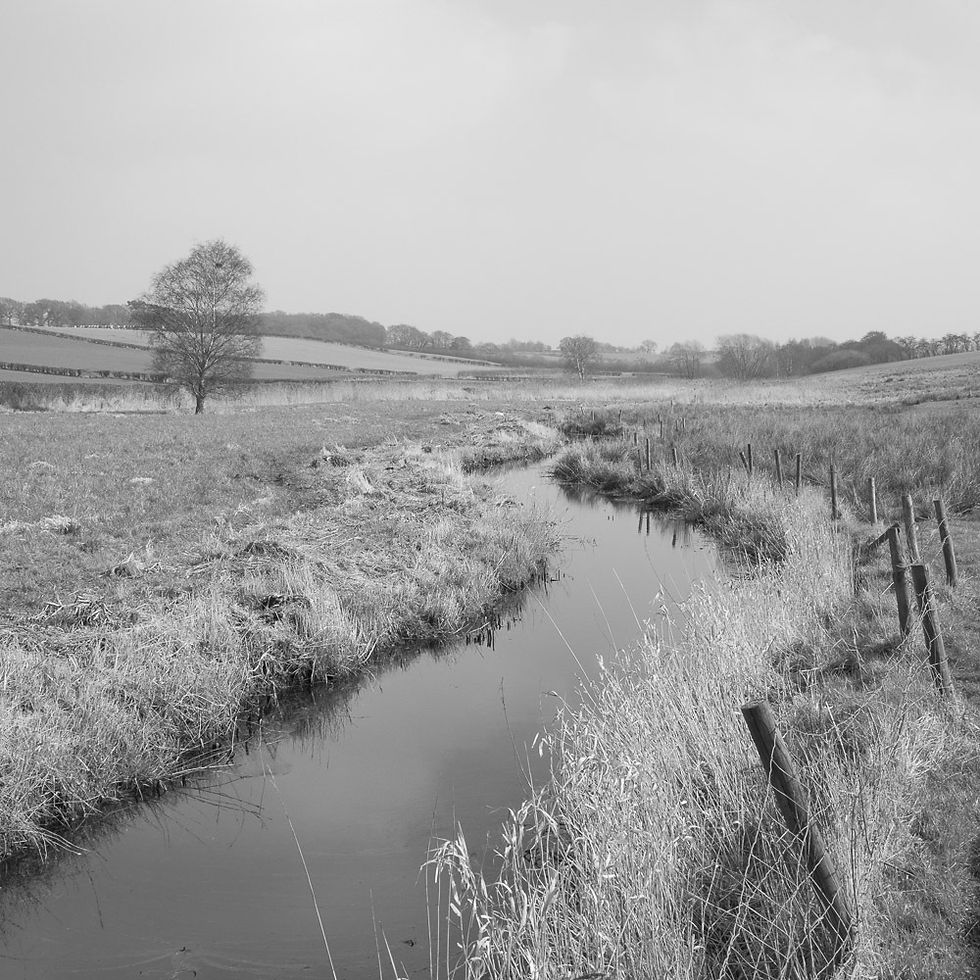
Olympus out-of-camera monotone rendering
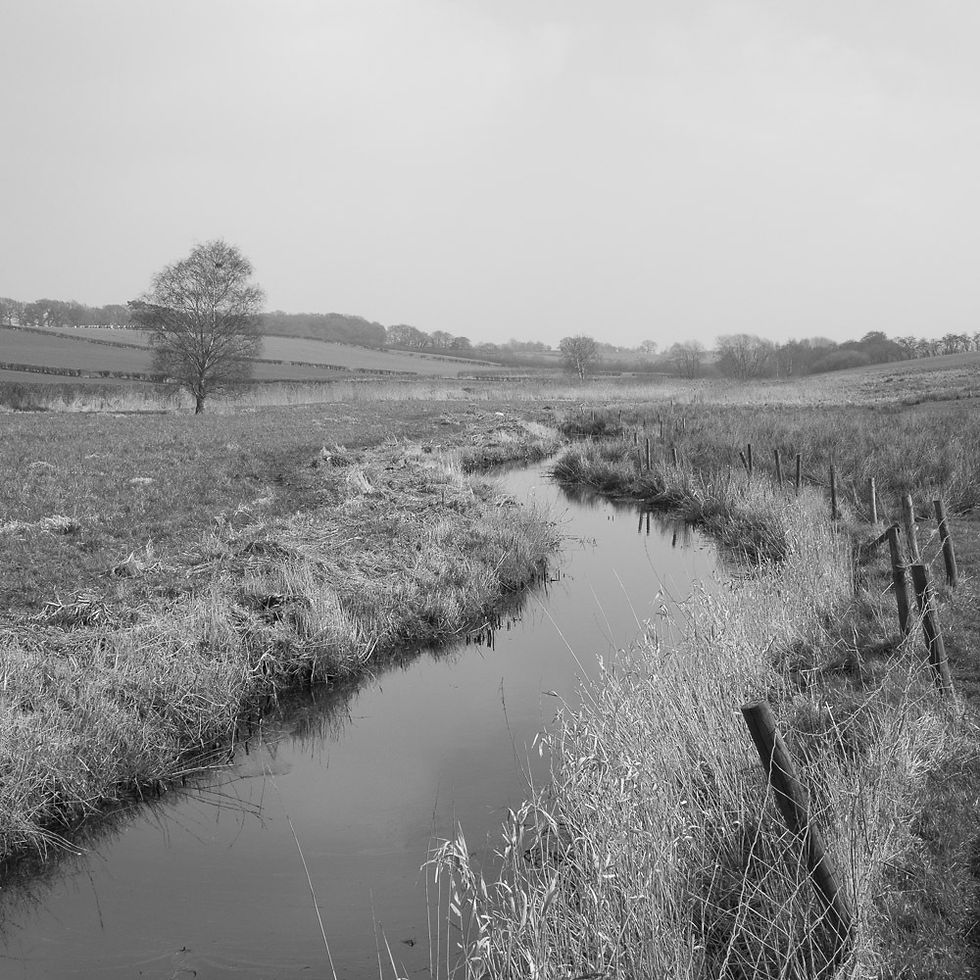
The next version is the raw file imported into Lightroom and then desaturated (Saturation slider set to -100). No other adjustments.

Lightroom conversion – desaturated only
It’s close to the in-camera version but slightly lacking in contrast.
The second version is the first with the addition of increasing Contrast to +20 and adding some sharpening. I used my own standard sharpening settings of:
Amount 60
Radius 0.5
Detail 40
Masking 30

Lightroom desaturated, Contrast +20 with sharpening
This time it has slightly more contrast than the in-camera conversion but that’s not all. It has a slightly different look to it. I conclude that the Olympus conversion uses a very mild contrast curve but with some extra “look” to it that I can figure out myself. Possibly it’s some difference in the mixing of the colours.
Next version is the raw file converted to monochrome using Lightroom’s “B&W” panel in the Develop module. From the “HSL / Color / B&W” panel I clicked B&W and didn’t do any further adjustments to the colour channels, nor did I do any other adjustments.
Lightroom B+W panel conversion
Next, I converted from raw in Lightroom using one of Lightroom’s B+W presets – “B+W Look 4”. This is my favourite Lightroom B+W look, low contrast, dark and gritty with significant vignetting. This is obviously quite different from the Olympus version.

Lightroom conversion – Lightroom B+W Preset 4
Finally, I found it very interesting to look at 100% crops. The sharpening and noise reduction applied by the camera are not nearly so nice as Lightroom when you look close up. These two crops show the out-of-camera version and then the Lightroom version using my standard sharpening settings (Oly first, then LR)
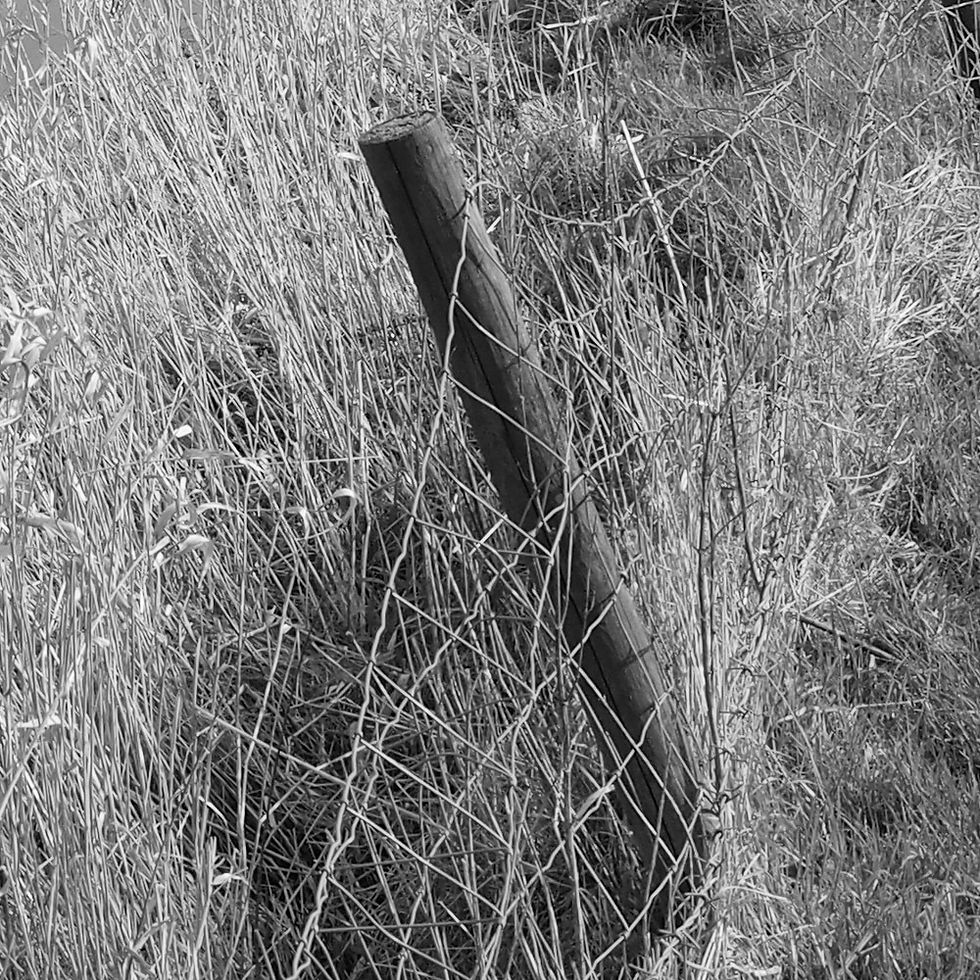
100% crop Olympus rendering

100% crop Lightroom conversion
I much prefer the detail in the Lightroom version but I don’t know how this will show on a large print. In normal on-screen viewing I don’t think it is noticeable.
Conclusions
I haven’t decided yet. I like the Olympus rendering and it would be good to have a totally monochrome workflow but I don’t want to use the Olympus Viewer software. I think I really have two choices:
Shoot in JPEG and accept what comes out of the camera with no adjustments.
Shoot raw and convert in Lightroom using B+W Preset 4
I think for the kind of B+W work I do it might be quite healthy to use the first option.
Comments